![]()
- Constructing the 'Ukulele Neck
- Shaping of the Neck and Tail Blocks
- Layout and Bending of 'Ukulele Sides and Lining
- Gluing Up of Top and Back of 'Ukulele
- Sanding and Shaping of Sound Board and Back
- Installing Neck onto 'Ukulele Body
- Glue in Top Lining and Top Braces
- Gluing on Sound Board of the 'Ukulele
- Gluing in of Bottom Lining and Back Bracing
- Gluing on Back of 'Ukulele
- Finishing Surface
- Making of Fret Board and Bridge
- Drilling of Holes for Tuning Keys
- Final Finishing
Gluing in of Bottom Lining and Back Bracing
1. Make plywood jig that is width of the narrowest point on the sound board to hold the back in place.
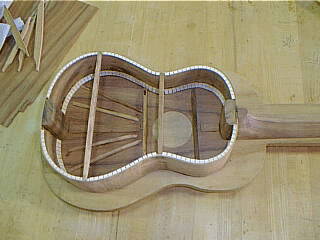
2. Cut notches in lining where cross braces will be installed.
3. Glue in bottom lining~. using 1" spring clamps. Make sure lining is glued in even with or slightly higher than the bottom edge of the side pieces when installed.
4. Cut and shape back braces for bottom and install in 'ukulele. Back braces go in the narrowest and widest points.
5. After glue has dried, sand bottom of body (including blocks and bracing) using a sanding block. Keep in mind that the back is usually curved or bellied outward (convex). This is accomplished by the curves of the two back braces.

